Plan editor (2D)
Draw walls, create zones, add doors and windows, bind sensors, and place devices on the plan.
On this page
The 2D editor is where you build the geometry that the 3D views render. Open it from Setup → Floors & Plans (see Setup mode ).
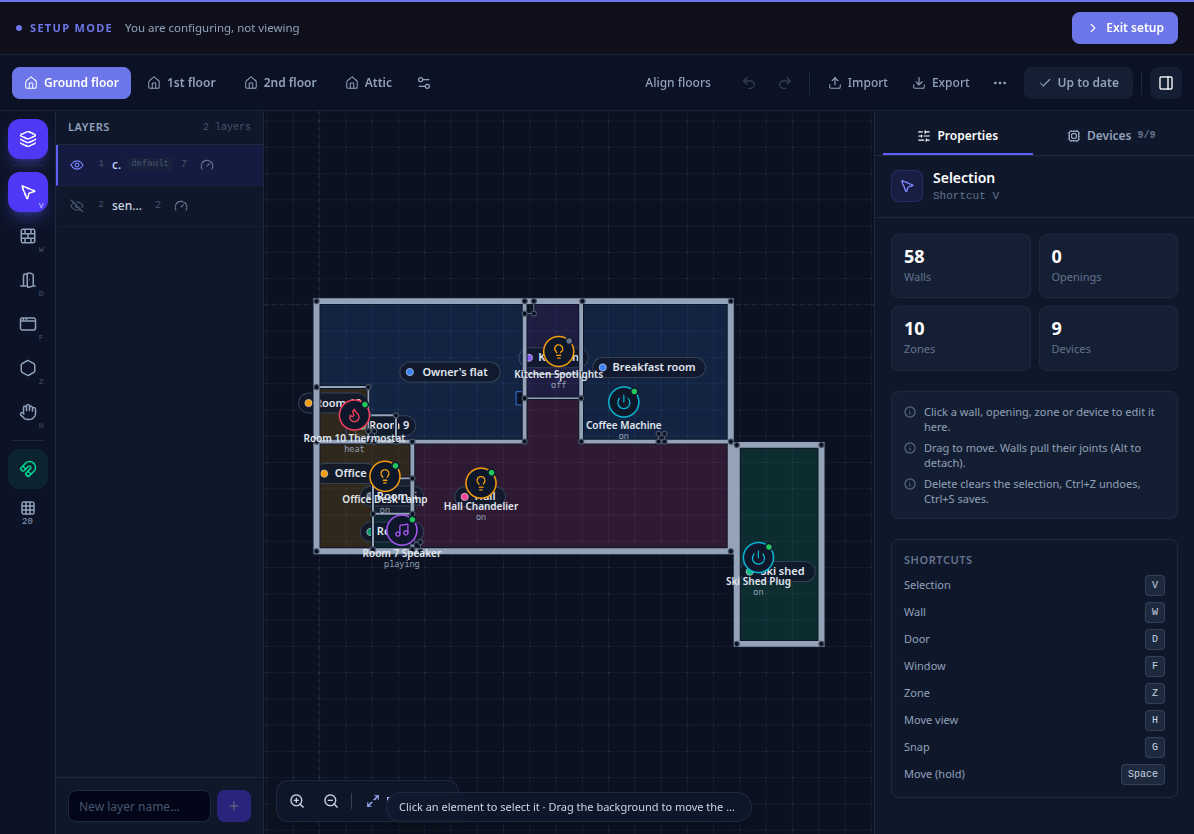
Walls and openings
- Draw a wall by clicking a start point then an end point. Each segment has a thickness.
- Add a door or a window to a selected wall. You can flip the side and the hinge, or turn a door into a simple passage without a leaf.
- Move and edit existing geometry by selecting it on the canvas.
Zones
A zone is a closed polygon representing a room or a garden sub-area.
- Draw the polygon point by point, then close it.
- Give it a name and a color used in the 3D view.
- Optionally bind temperature and humidity sensors and set their comfort thresholds. The sensors layer uses these to display and pulse readings.
Placing devices
- Open the device palette — it lists every supported device discovered from Home Assistant, filtered and normalized by Walldash.
- Drag a device onto the plan to anchor it at 2D coordinates. On a touch tablet (iPad), drag the device icon from the palette with your finger; on a computer you can also press the crosshair button then tap the desired spot.
- Double-click a placement to edit it:
- a custom name,
- the icon,
- the render domain (how the device is drawn in 3D),
- the layer it belongs to.
Device placements are what connect a point on the plan to a real Home Assistant entity. Moving a placement updates its position in the 3D views immediately.
Levels
Use the level manager to:
- Create, rename and delete levels.
- Mark a level as outdoor (garden, patio).
- Reorder levels — this order is used by the house overview .
- Manage the level’s display layers.
Importing and exporting
- Import an additional
.sh3dfile at any time. - Export a full JSON backup of levels, plans, placements and dashboards. You can replay it from the onboarding wizard or the restore entry point.